Wednesday, December 4, 2013

 Back to the Long Rod Norton motor . Same as all engine rebuilds you must clean those cases . I also deburred all holes and stoned the surfaces flat . Checked all thread condition . This should be done prior to reassembling the engine .


  The crank was taken apart to clean the sludge trap . While apart stone down the surfaces for a nice flat contact when going back together . This is a good time to polish the crank if you are going to that level . After reassembly make sure it is true . If there is a burr or deri on the surface between the flywheel and journal the main shafts will not be inline . I also check to make sure the balance factor is correct .


 Install new plain bearings and check for clearance . I measure the rod bolts before installing them . then make sure they stretch the correct amount . Proper bolt stretch makes the tensile strength correct . I always use new rod bolts from a known manufacturer . I have heard lots of guys say they reuse the bolts but I don't trust that and it is a cheap insurance practice .


C


Monday, December 2, 2013

Wiring is the killer of a clean motorcycle .
      To fix this most guys run the wire in the frame . The big issue there is they usually don't do it before they paint the bike or they drill small holes for single wire . This has never looked right to me so I do it my own way as follows.

 1 drill hole for wire to go through . I lay out my wire plan during fab then do all this work after tear down .
 2. The next step id to tack a washer and hammer it down for a nice tight fit .
 3. Weld all the way around the washer inside and out . When you weld the inside it burns out any burrs left in the hole .
 4. On this bike there was lots of wasted space under the tank so that is where most of the electrical is hidden .
 5. The fairing supports where cut off to fit a springer . It made for a great place to run the wire through . Just welded a washer around the hole first .
Once this is back from powder coat you will see how finished it makes the bike look . Remember the DEVIL IS IN THE DETAILS !

Thursday, November 21, 2013

The T120 before it came apart for powder coat . Soon we should have pics of the sheet metal painted and seat leather work done .

Tuesday, November 19, 2013


Here are some other pictures my friend Asa took from http://www.asagilmore.com/agphoto/ . He is one of the best photographers I know .
Yes we know the headlight is off to one side !!


Here are a few more of Lue's bike before it came apart for powder coat and chrome . The joy of custom bike building is waiting on others so you can finish .


Thursday, November 14, 2013

Our current build project, 1967 Triumph T120. Stay tuned for more updates....

Thursday, October 24, 2013

The infamous "Britster" aka Joelene. People either love it or hate it!


This labor of love boasts of hundred of hours of hand craftsmanship by her owner, Joshua Morrow, and our own fabrication guru, Nicholas McLean. It is known by Josh's wife as the mistress.
What is it?
Ironhead Sportser Engine with our Brass Rocker Nuts
5 Speed Triumph Transmission
Custom Manifold with Dual Amal Carbs
Axed BSA Gas Tank
Suicide Clutch
Hand Shift
Left Hand Throttle
Custom Pipes by Nick & Josh
Twisted Oil Tank created by Josh
Twisted Stainless Hex frame work, sissybar and brackets by Nick & Josh.
Custom seat pan created by Josh & cover by our resident leatherworker, Brianne McLean.
Quickest paint job ever, done by Brianne & striping by Danny (Mugroso).
 

Saturday, July 6, 2013

Fiberglass Seat Pan Tutorial


Custom Fiberglass Seat Tutorial:


1.      Mask area with masking tape; then cover with aluminum tape. Do not apply aluminum tape directly to the frame and fender.  It will leave a terrible sticky residue.

2.  Cover around the area to prevent dripping resin all over the bike.


3.      Find a girl that knows how to do the work for you.

4.      If you can’t find one of these elusive creatures, tear fiberglass mat into smaller strips.  They will conform to the curves better when you begin to lay the glass.

5.      Mix a small amount of resin according to instructions on container. Do not mix the entire can at once. It will kick before you are done making your seat pan. You won’t like paying the additional $16 stupidity fee for more resin.
 
 
6.      Pre-wet the fiberglass strips on a piece of cardboard. This will keep you from slopping resin all over the place and give you a good glass to resin ratio.  That way you don’t end up with a brittle, resin soaked seat.


7.      Lay glass down one strip at a time, slightly overlapping as you go.

8.      Repeat steps 6 and 7 until you get your desired thickness. About 1/8” will work just fine. It will take 1 to 2 packages of fiberglass mat depending on the size of your seat pan.


9.      After the glass dries, unmold the pan from the tape. It will take a little muscle, but it should be flexible enough to work free without breaking it.

10. Place pan back on the frame, after all tape is removed, and mark your cut lines.


11. If you don’t have a fancy reciprocating saw, cut to desired shape using a hacksaw blade. You can use a grinder as well, but the blade is much less messy.  Less chance of being covered in fiberglass dust and crying like a baby.


12. Once you are happy with the shape of your pan, attach rubber trim with a little bit of Loctite adhesive. This will prevent the glass from cutting into your upholstery later.


13. Begin lying and shaping closed cell neoprene foam using your handy dandy hack saw blade.  Layer the foam until you get close to your desired shape. It may look hideous until you place the last full layer of foam over the top to smooth it all out. 3M General Trim Adhesive works wonders at sticking the whole thing together.


14. Sand and smooth out the edges and you are ready for upholstery. The seat pan should be conformed well enough to the frame that all you need to attach it is some heavy duty Velcro.


Saturday, June 15, 2013

GRIPS!!!!!!

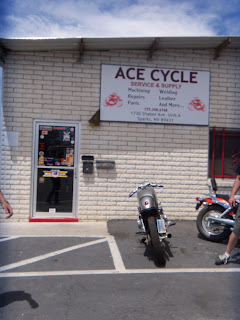
Come on by and check out our amazing grip selection. 1730 Shaber Ave. Sparks, NV

And We have some cool seats too!

Saturday, June 1, 2013

We are posting again!

Our new shop is up and running smooth and now we are going to start posting on the blog again. I know you all missed us!

Today Trevor is working an a 1969 BSA and Nick is getting his hands dirty with a 1954 Triumph.